DeLonghi ECAM 22․110 B Manual: A Comprehensive Guide
Welcome! This manual provides essential guidance for setting up, using, and maintaining your DeLonghi Magnifica S ECAM 22;110 B automatic coffee machine, ensuring optimal performance and enjoyment․
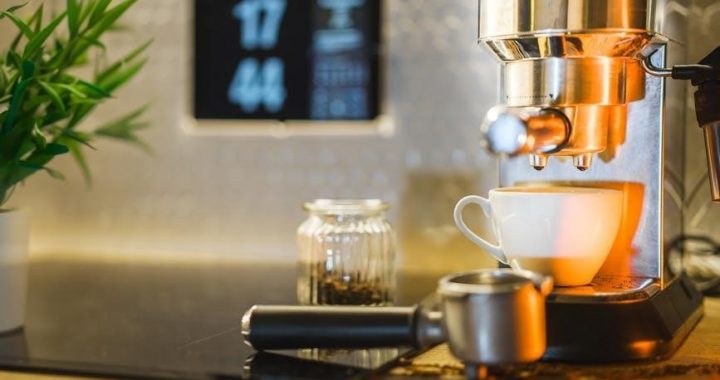
Congratulations on choosing the DeLonghi ECAM 22․110 B Magnifica S, an automatic coffee machine designed to deliver authentic Italian espresso at the touch of a button․ This machine represents a blend of simplicity and sophistication, bringing café-quality coffee into your home․
This manual serves as your comprehensive guide, walking you through every aspect of your new coffee maker – from initial setup and daily operation to regular maintenance and troubleshooting․ DeLonghi prioritizes user experience, and this model is engineered for ease of use, allowing you to quickly brew your favorite coffee beverages․
Before first use, please take the time to carefully read through this manual to familiarize yourself with the machine’s features and safety precautions․ Registering your product unlocks personalized support, exclusive offers, and access to a wealth of resources․ Enjoy exploring the world of DeLonghi coffee!
Key Features and Specifications
The DeLonghi ECAM 22․110 B boasts several key features designed for convenience and quality․ It’s an automatic coffee machine, simplifying the brewing process with pre-programmed settings․ The adjustable coffee mill allows you to customize the grind to your preference, influencing the aroma and body of your espresso․
This model features a user-friendly control panel for easy operation․ It accepts both coffee beans and pre-ground coffee, offering flexibility․ The machine also includes a milk frothing wand, enabling you to create cappuccinos and lattes․
Specifications: While detailed specifications are available in the full manual, key aspects include a 15-bar pump pressure, a 1․8-liter water tank capacity, and a bean container holding approximately 250 grams․ It’s designed for both convenience and delivering consistently delicious coffee․
Setting Up Your Coffee Machine
Prepare for delicious coffee! This section guides you through the initial setup process, ensuring your DeLonghi ECAM 22․110 B is ready for brewing․
First-Time Setup Instructions

Initial Preparation is Key: Before your first cup, carefully unpack your DeLonghi ECAM 22․110 B and remove all packaging materials․ Ensure all components are present․ Thoroughly rinse the water tank, drip tray, and coffee bean container with warm water – avoid using detergents․
Powering On & Initial Rinse: Connect the machine to a grounded power outlet․ Turn on the appliance; the machine will automatically begin an initial rinsing cycle․ This process cleans the internal circuits and is crucial for optimal flavor․ Follow the on-screen prompts, if any, during this cycle․
Water Hardness Setting: The machine requires a water hardness setting for proper descaling alerts․ Consult your local water authority for hardness information, or use a water hardness test strip․ Enter the appropriate setting via the machine’s control panel․ This ensures the longevity of your coffee machine․
Installing the Water Softener Filter
Filter Installation Process: To maintain optimal water quality and prolong the life of your DeLonghi ECAM 22․110 B, install the water softener filter․ First, remove the water tank․ Locate the filter holder within the tank․ Remove the protective wrapping from the new filter․
Securing the Filter: Insert the filter into the holder, ensuring it clicks securely into place․ Some models require a specific orientation – consult the filter packaging․ Reattach the water tank to the machine․
Initial Filter Rinse: After installation, run approximately two full tanks of water through the machine to flush the filter and remove any residual carbon particles․ This ensures the purest possible water for brewing․ Replace the filter every two months, or after 50 liters of water, depending on your water hardness and usage․
Filling the Water Tank
Water Tank Location & Removal: The water tank is easily accessible on your DeLonghi ECAM 22․110 B․ To fill it, gently remove the tank from the machine․ It’s designed for convenient removal and replacement․ Ensure the machine is switched off before handling the tank․
Filling Instructions: Fill the tank with fresh, cold, filtered water up to the ‘MAX’ level indicated․ Avoid overfilling, as this could cause issues during brewing․ Using filtered water is highly recommended to prevent scale buildup and ensure the best coffee flavor․
Reattaching the Tank: Once filled, carefully reattach the water tank to the machine, ensuring it clicks securely into place․ The machine will not operate if the tank is not correctly positioned․ Regularly check the water level and refill as needed for uninterrupted coffee enjoyment․
Brewing Coffee with the ECAM 22․110 B
Enjoy delicious coffee! This section details how to brew perfect espresso and customize your coffee experience using beans with your DeLonghi machine․
Using Coffee Beans
Freshly ground beans are key! The ECAM 22․110 B is designed to work optimally with coffee beans, delivering a richer, more aromatic brew compared to pre-ground coffee․ Ensure your beans are fresh and stored in an airtight container to preserve their flavour․
To use coffee beans, simply fill the bean container located on top of the machine․ The machine will automatically grind the beans just before brewing, guaranteeing maximum freshness․ It’s important to use beans that are appropriate for espresso machines – not too oily or too finely ground initially․
Experiment with different bean varieties to discover your preferred taste profile․ The machine’s adjustable grinder allows you to fine-tune the grind size, impacting the coffee’s strength and flavour․ Remember to regularly check and refill the bean container for uninterrupted brewing!
Adjusting the Coffee Mill
Fine-tune your brew! The ECAM 22․110 B features an adjustable coffee mill, allowing you to customize the grind size to suit your preferred coffee beans and taste․ A finer grind is ideal for a stronger, more intense espresso, while a coarser grind results in a milder flavour․
To adjust the mill, access the settings through the machine’s control panel․ The adjustment typically involves rotating a dial or navigating a menu․ Start with the default setting and make small adjustments, brewing a test shot after each change․
Observe the coffee extraction – if it’s too fast, use a finer grind; if it’s too slow, opt for a coarser setting․ Finding the sweet spot requires experimentation, but the result is a perfectly tailored cup of coffee․ Remember to note your preferred settings for consistent results!
Customizing the Aroma
Enhance your coffee experience! The DeLonghi ECAM 22․110 B allows you to personalize the aroma intensity of your coffee․ This feature lets you control the strength and richness of the flavour, catering to individual preferences․

Through the machine’s user interface, you can select from various aroma settings – typically ranging from mild to strong․ A stronger aroma setting uses more coffee and extracts more flavour compounds, resulting in a bolder taste․ Conversely, a milder setting uses less coffee, producing a lighter, more delicate brew․
Experiment with different settings to discover your ideal aroma level․ Consider the type of coffee beans you’re using; darker roasts generally benefit from a milder aroma setting, while lighter roasts can handle a stronger one․ Enjoy the journey of finding your perfect cup!
Brewing Espresso
Crafting the perfect espresso! The DeLonghi ECAM 22․110 B simplifies brewing authentic espresso in your home․ Begin by ensuring the machine is properly set up with fresh coffee beans and water․ Select the espresso brewing option on the control panel – typically a single or double shot․
The machine will automatically grind the beans, tamp the grounds, and brew the espresso․ Brewing time is crucial; a properly extracted espresso should take around 25-30 seconds․ Observe the flow – it should resemble warm honey․ Adjust the coffee grind size if the extraction is too fast or too slow․
Experiment with different bean types and grind settings to achieve your desired espresso flavour profile․ A fine grind is generally preferred for espresso, but adjustments may be needed based on the bean’s origin and roast level․
Milk-Based Drinks
Elevate your coffee experience! Discover how to create delicious milk-based beverages like cappuccinos and lattes using the ECAM 22․110 B’s convenient features․
How to Make a Cappuccino
Creating the perfect cappuccino with your DeLonghi ECAM 22․110 B is simple! First, brew a single espresso shot directly into your cappuccino cup․ While the espresso is brewing, use fresh, cold milk – whole milk is recommended for the best texture․
Next, utilize the machine’s milk frother to steam and froth the milk․ Position the frothing nozzle just below the milk surface to introduce air, creating a rich, velvety foam․ Once frothed, gently tap the milk jug on the counter to eliminate any large bubbles․

Slowly pour the frothed milk into the espresso, holding back the foam initially․ Finish by spooning the remaining foam onto the top, creating the classic cappuccino layering․ A light dusting of cocoa powder can be added for an extra touch of flavour․ Enjoy your expertly crafted cappuccino!
Cleaning the Cappuccino Maker
Maintaining a clean cappuccino maker is crucial for optimal performance and hygiene․ After each use, immediately wipe the steam wand with a damp cloth to remove any residual milk․ This prevents milk from drying and becoming difficult to remove․
Regularly disassemble the milk frother components – the nozzle and any detachable parts – and wash them thoroughly with warm, soapy water․ Rinse completely and allow to air dry before reassembling․ For stubborn milk residue, soak the parts in a solution of warm water and a mild detergent․
Periodically, run a cleaning cycle using water to flush out the internal milk channels․ Refer to your machine’s manual for specific instructions on initiating this cycle․ Consistent cleaning ensures consistently perfect frothed milk and prolongs the life of your cappuccino maker․

Maintenance and Cleaning
Regular upkeep is vital for your ECAM 22․110 B․ Descaling, general cleaning, and following a maintenance schedule will ensure longevity and optimal brewing performance․
Descaling Your Coffee Machine
Descaling is crucial to remove mineral buildup that can affect your ECAM 22․110 B’s performance and coffee quality․ DeLonghi recommends descaling regularly, the frequency depending on your water hardness․ Use a dedicated descaling solution specifically designed for coffee machines – avoid vinegar or other household cleaners․
The machine features a dedicated descaling program; First, empty the water tank and fill it with a descaling solution mixed with water, following the solution’s instructions․ Then, initiate the descaling cycle through the machine’s menu․ The machine will guide you through the process, including rinsing the system thoroughly with fresh water after descaling is complete․
Important: Never interrupt the descaling cycle once started․ Regular descaling ensures your machine continues to brew delicious coffee for years to come, preventing damage and maintaining optimal functionality․ Refer to the full manual for detailed instructions and specific warnings․
General Cleaning Procedures
Maintaining cleanliness is vital for hygiene and optimal performance of your DeLonghi ECAM 22․110 B․ After each use, empty the drip tray and grounds container․ Rinse these components with warm water and mild detergent, ensuring they are thoroughly dry before reinserting․
The brewing unit is a key component requiring regular cleaning․ Remove it following the manual’s instructions and rinse it under running water․ Wipe down the exterior of the machine with a damp cloth․ Avoid abrasive cleaners or immersing the machine in water․
Periodically clean the milk frother, especially after using milk-based drinks, to prevent buildup․ Disassemble the frother components and wash them with warm, soapy water․ Ensure all parts are completely dry before reassembling․ Consistent cleaning extends the lifespan of your machine and guarantees consistently delicious coffee․
Regular Maintenance Schedule
To ensure your DeLonghi ECAM 22․110 B continues to deliver exceptional coffee, adhere to a consistent maintenance schedule․ Daily: Empty the drip tray and used coffee grounds container․ Wipe down the machine’s exterior․ Weekly: Remove and rinse the brewing unit thoroughly․ Clean the milk frother after each use, and perform a more detailed cleaning weekly․
Monthly: Descale your coffee machine using a suitable descaling solution (refer to the ‘Descaling’ section)․ This removes mineral buildup, preserving performance․ Every 2-3 Months: Lubricate the brewing unit according to the manual’s instructions․ Inspect water filter (if installed) and replace if necessary․
Following this schedule will prolong the life of your machine and maintain optimal brewing quality․ Refer to the full manual for detailed instructions on each procedure․

Troubleshooting Common Issues
Facing problems? This section addresses typical issues like the machine not powering on, brewing failures, or milk frother malfunctions, offering quick solutions․
Coffee Machine Not Turning On
Is your DeLonghi ECAM 22․110 B failing to power on? First, verify the power cord is securely connected to both the machine and a functioning electrical outlet․ Test the outlet with another device to confirm it’s supplying power․
Check the main power switch, typically located on the rear or underside of the machine, ensuring it’s in the ‘on’ position․ If the issue persists, examine the fuse within the plug – a blown fuse will prevent operation․ Replace it with a fuse of the correct amperage rating only․
Consider a power surge may have affected the machine; try a different outlet or reset the circuit breaker․ If none of these steps resolve the problem, it may indicate an internal fault requiring professional service․ Do not attempt to disassemble the machine yourself, as this could void the warranty and pose a safety risk․ Contact an authorised service centre for assistance․
Coffee Not Brewing Properly
Is your DeLonghi ECAM 22․110 B producing weak, inconsistent, or no coffee? Begin by checking the water tank – ensure it’s adequately filled with fresh water․ Verify the bean container isn’t empty and contains suitable coffee beans․ A coarse grind setting can lead to under-extraction, while a fine grind may cause blockage․
Adjust the coffee mill to a more appropriate setting, experimenting to find the optimal grind for your beans․ Descale the machine regularly, as mineral buildup can restrict water flow․ Clean the brew unit thoroughly, removing any coffee residue that may be causing obstructions․
Ensure the coffee grounds are evenly distributed in the portafilter․ If problems persist, run a cleaning cycle to flush the system․ If the issue continues, contact an authorised service centre for professional diagnosis and repair․
Milk Frother Malfunctions
Experiencing issues with the milk frother on your DeLonghi ECAM 22․110 B? First, ensure the cappuccino maker is correctly assembled and securely attached․ Check for any blockages in the steam wand or milk container – residue can impede proper frothing․ Regular cleaning is crucial; disassemble and wash all components after each use․
Verify the milk is cold and fresh, as warm milk doesn’t froth as effectively․ Descale the machine, as mineral buildup can affect steam production․ Run a cleaning cycle specifically for the milk circuit to remove stubborn deposits․
If the frother isn’t producing steam, check the water level and ensure the machine has fully heated up․ If problems persist, consult the manual’s troubleshooting section or contact an authorised service centre for assistance․

Additional Resources
Explore further support! Register your product, find authorised service centres, and discover exclusive offers and accessories to enhance your coffee experience․
Registering Your Product
Unlock a world of benefits by registering your DeLonghi ECAM 22․110 B! Registration is quick and easy, and it allows you to access personalised support tailored specifically to your coffee machine model․ By registering, you’ll receive important product updates, helpful tips, and exclusive content designed to elevate your brewing experience․
Furthermore, registration grants you access to exclusive offers, including a current promotion of 20% off accessories․ This is a fantastic opportunity to expand your coffee-making capabilities with compatible DeLonghi products․ You can register your product directly through the DeLonghi website, ensuring your details are securely stored and readily available should you ever require assistance․ Don’t miss out on these valuable advantages – register today!
Authorised Service Centres
Need expert assistance with your DeLonghi ECAM 22․110 B? DeLonghi maintains a network of authorised service centres dedicated to providing professional repairs and support for your coffee machine․ These centres employ trained technicians who understand the intricacies of DeLonghi appliances, ensuring your machine receives the highest quality care․
Locating an authorised service centre is simple․ Visit the DeLonghi website and use their service centre locator tool, entering your location to find the nearest qualified provider․ Using an authorised service centre guarantees genuine DeLonghi parts and adherence to strict quality standards, protecting your machine’s warranty and performance․ Don’t risk using unqualified repair services – choose a DeLonghi authorised centre for peace of mind and lasting reliability․
Exclusive Offers and Accessories
Enhance your coffee experience! DeLonghi frequently offers exclusive promotions and discounts on accessories designed specifically for your ECAM 22․110 B Magnifica S․ Registering your product unlocks access to these personalised offers, ensuring you don’t miss out on valuable savings․
Explore a range of accessories, including descaling solutions, water filters, and cleaning products, all formulated to maintain your machine’s peak performance․ DeLonghi also provides a selection of coffee mugs and other related items to complete your coffee ritual․ Currently, enjoy 20% off accessories – a fantastic opportunity to invest in the longevity and enjoyment of your coffee machine․ Visit the DeLonghi website to browse the current selection and take advantage of these exclusive deals!